
個人知識庫搭建計劃 / Personal Knowledge Base Setup Plan
本文件提供兩種獨立方案,按需選擇,不必都做。
Two independent options below. Pick one or both — they don't depend on each other.
這裡的「Agent 軟體」指 AI 編程助手,例如 Claude Code、Trae、Cursor。它可以幫你直接用一句話完成「同步到 GitHub」「整理資料夾」這些操作,不用學 Git 命令。
"Agent software" here means an AI coding assistant like Claude Code, Trae, or Cursor — you tell it in plain language ("sync to GitHub") and it handles the Git commands for you.
方案 A:本地知識庫搭建 / Local Knowledge Base
最終效果:在電腦上用 Obsidian 寫筆記,按 Ctrl+S 後自動同步到 GitHub 雲端備份。
End result: Write notes in Obsidian on your computer, auto-sync to GitHub cloud backup.
第 1 步:註冊 GitHub 賬號 / Register a GitHub account
打開 https://github.com ,點右上角 Sign up。
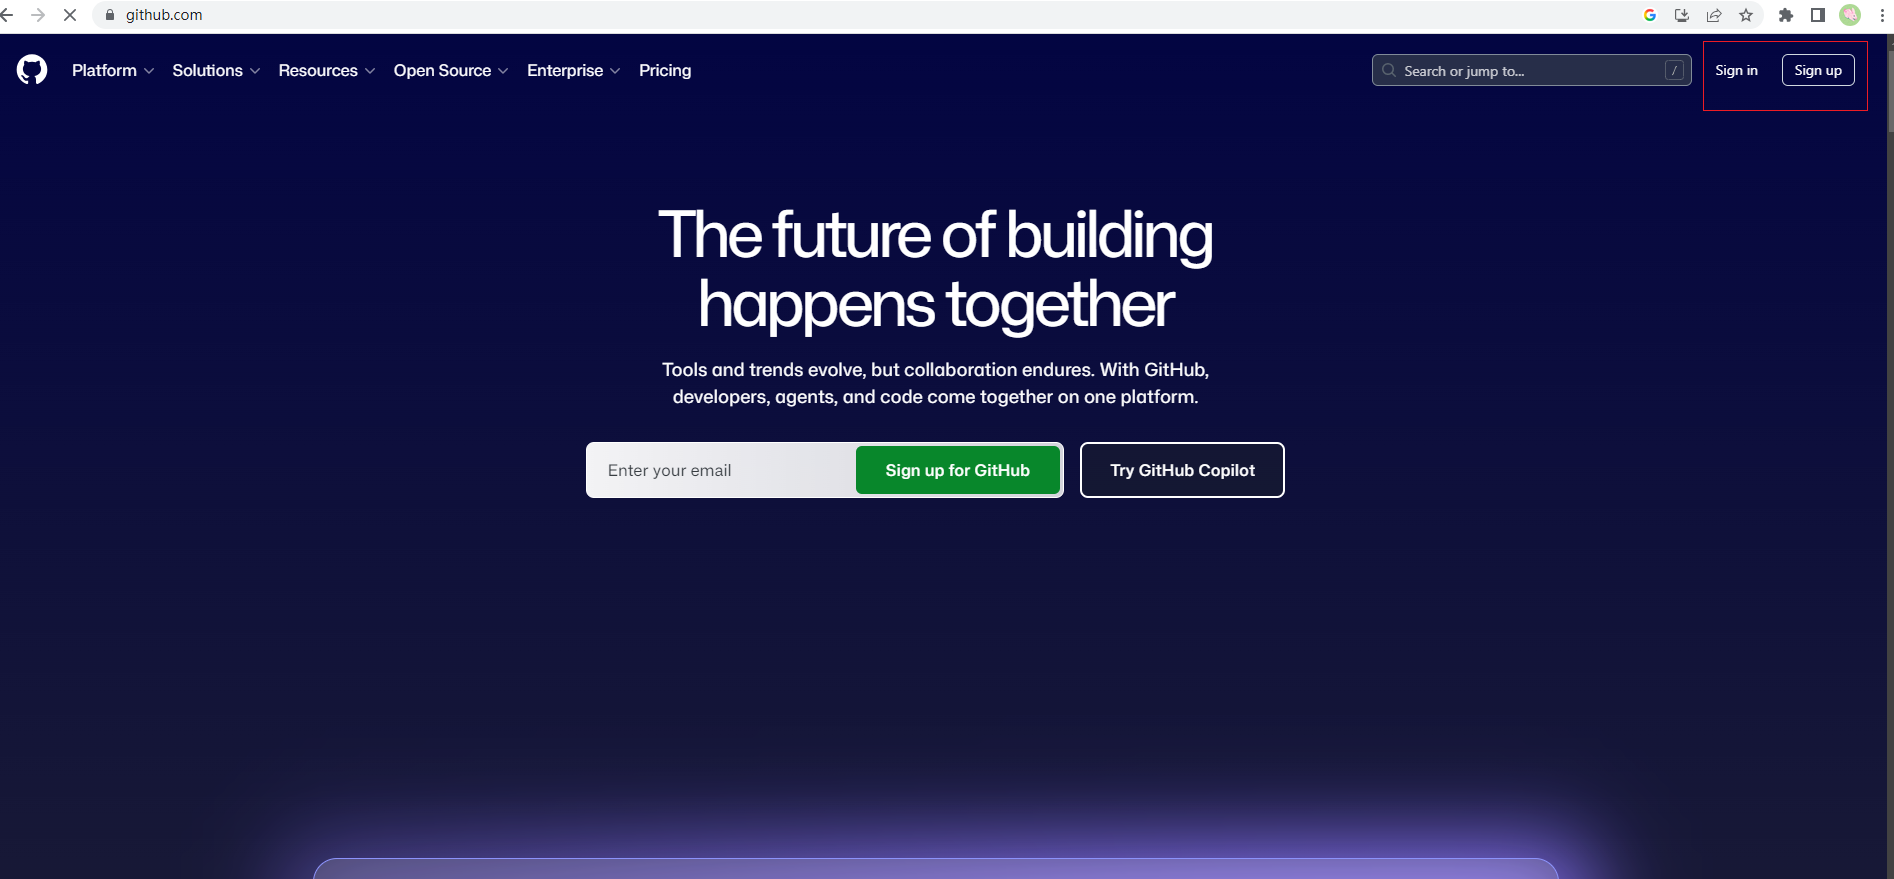
填郵箱、密碼、用戶名(用戶名建議用英文,例如
jacky-chen,後面會用到)。驗證郵箱即可。
第 2 步:在 GitHub 建一個倉庫(用來存筆記)/ Create a repo for your notes
登入後點左上角 + → New repository。
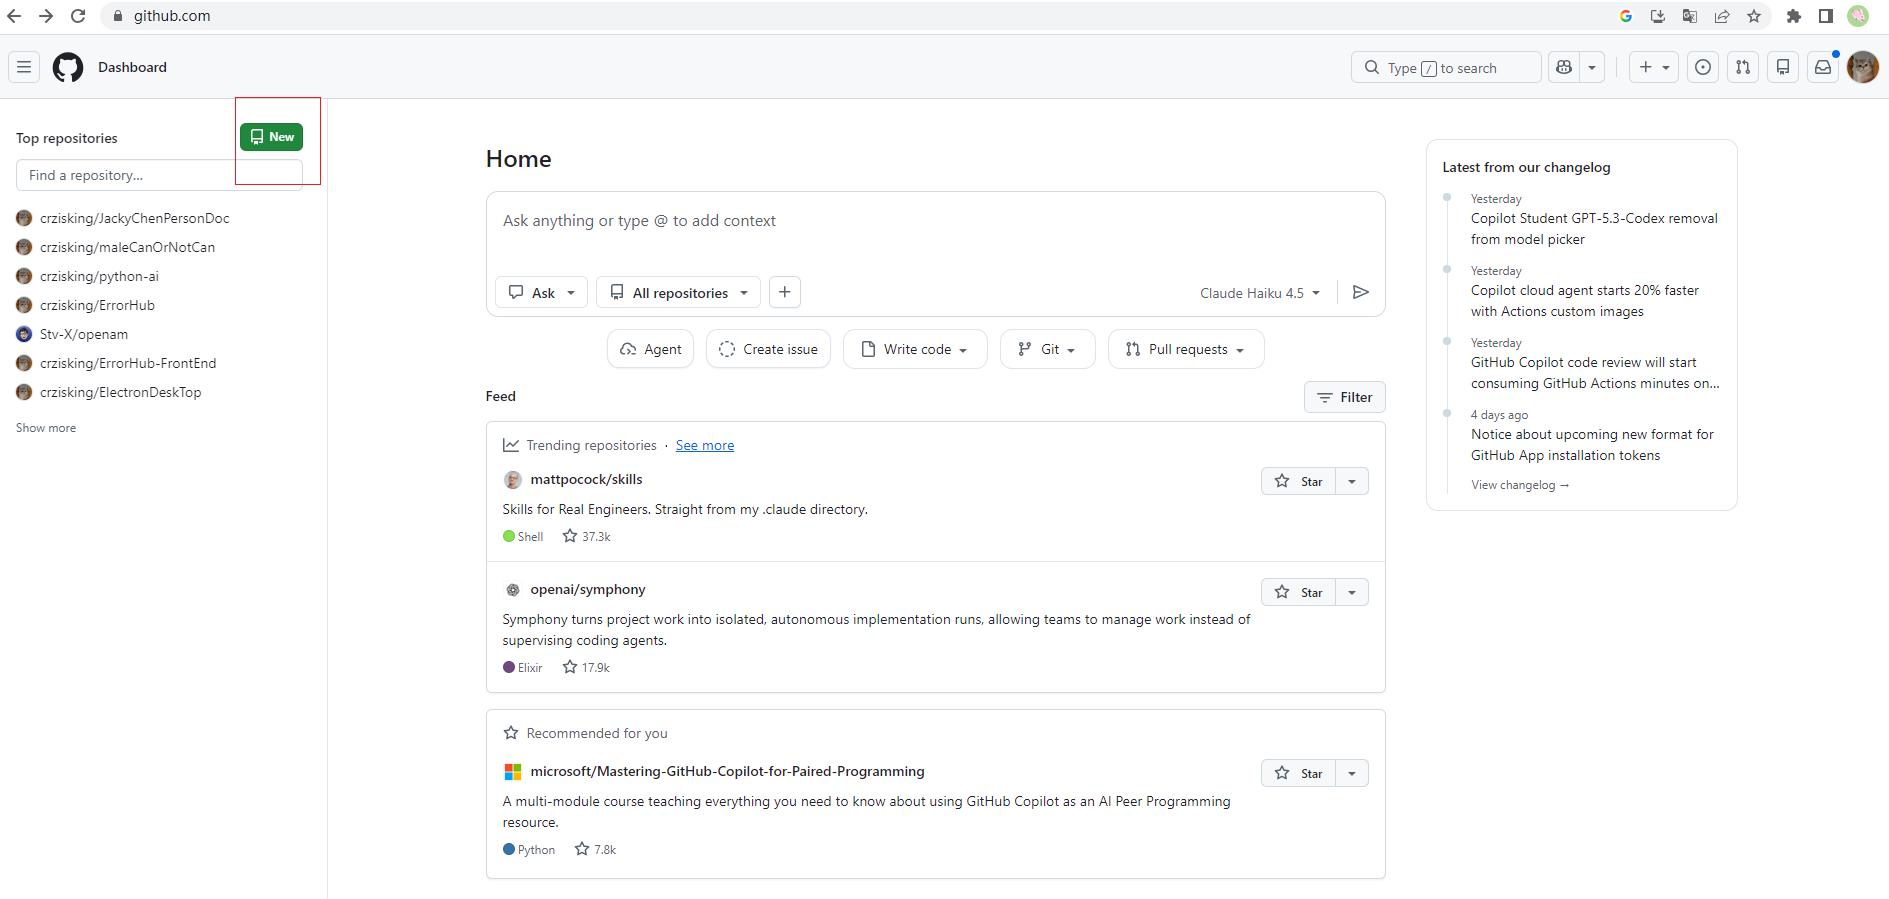
Repository name 填
Personal-Knowledge-Base。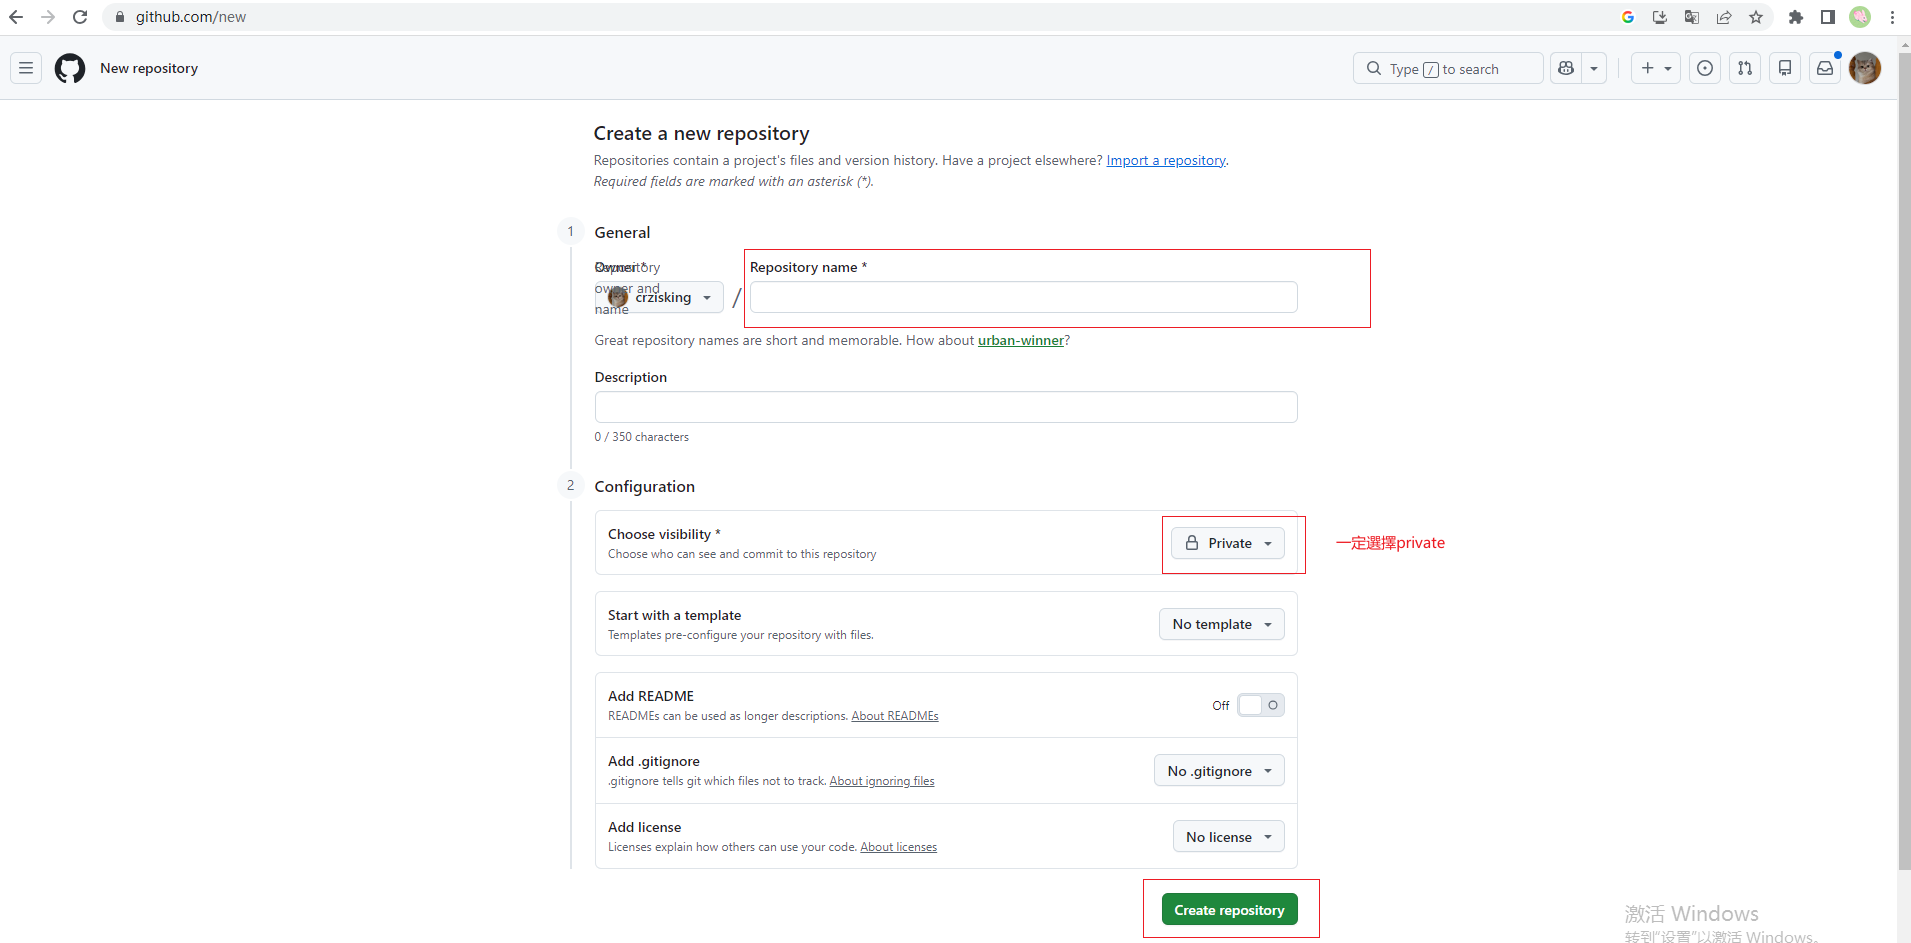
選 Private(私人,避免別人看到你的筆記)。
勾選 Add a README file。
點 Create repository。
第 3 步:安裝 Agent 軟體(Claude Code / Trae / Cursor 任選一個)/ Install an AI Agent
Agent 軟體會替你做兩件事:① 幫你把 GitHub 倉庫拉到本地;② 之後用自然語言就能備份筆記,不用學 Git 命令。
The agent does two things: ① clones your GitHub repo locally; ② lets you back up notes by typing plain language — no Git commands needed.
選一個你喜歡的安裝即可:
Claude Code(推薦,命令列):https://claude.com/claude-code (國內下載要門檻,有能力的可以自行下載使用)
Trae(圖形介面,國內可用):https://www.trae.ai (字節跳動 可以下載)
Cursor(圖形介面,類似 VSCode):https://cursor.com (本人沒使用過)
安裝後通用步驟:
打開 Agent,登入賬號。
直接用一句話讓它幫你 Clone 倉庫,例如:
幫我把 GitHub 上
你的用戶名/Personal-Knowledge-Base這個倉庫 clone 到D:\KnowledgeBase
如何找到倉庫地址,在新建好倉庫以後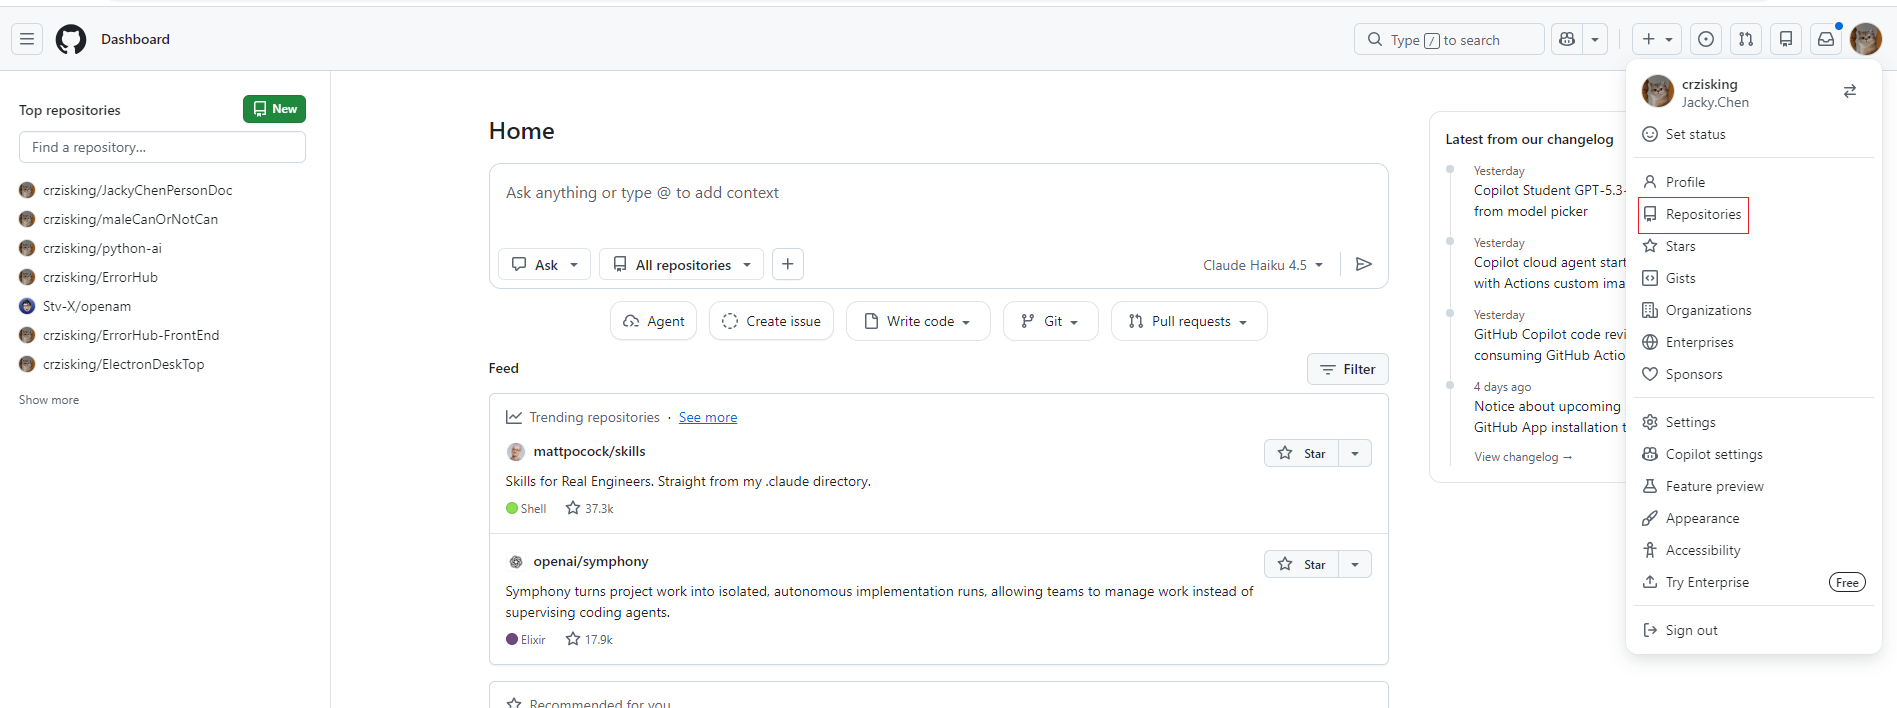
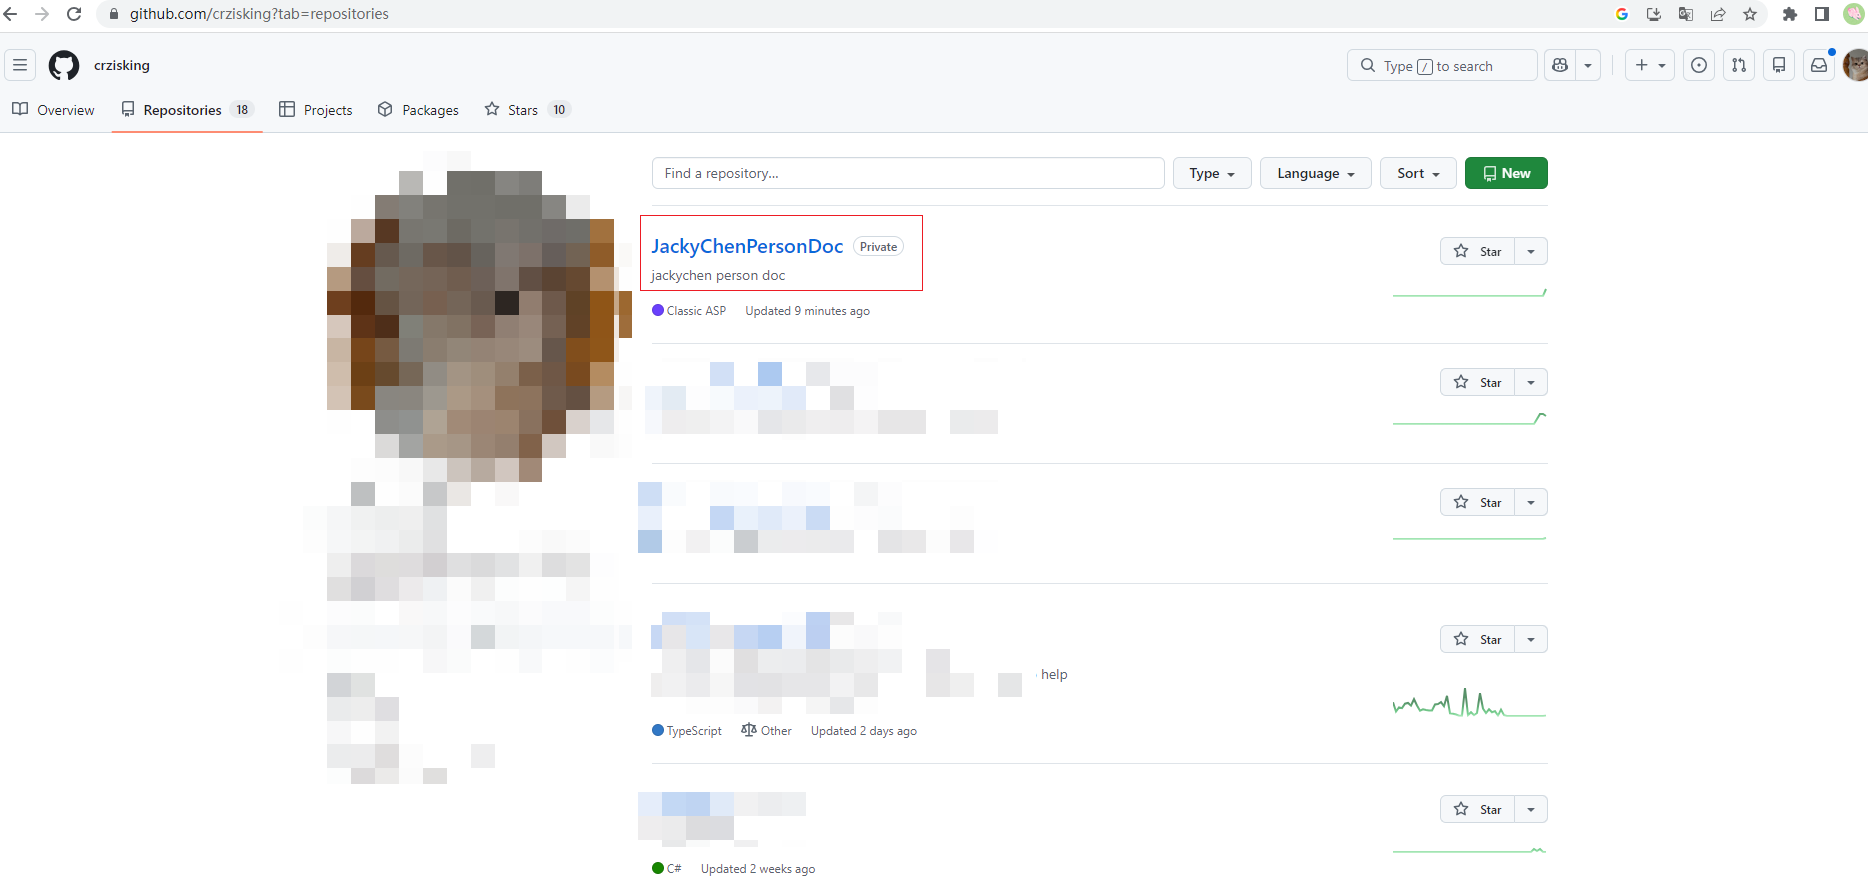
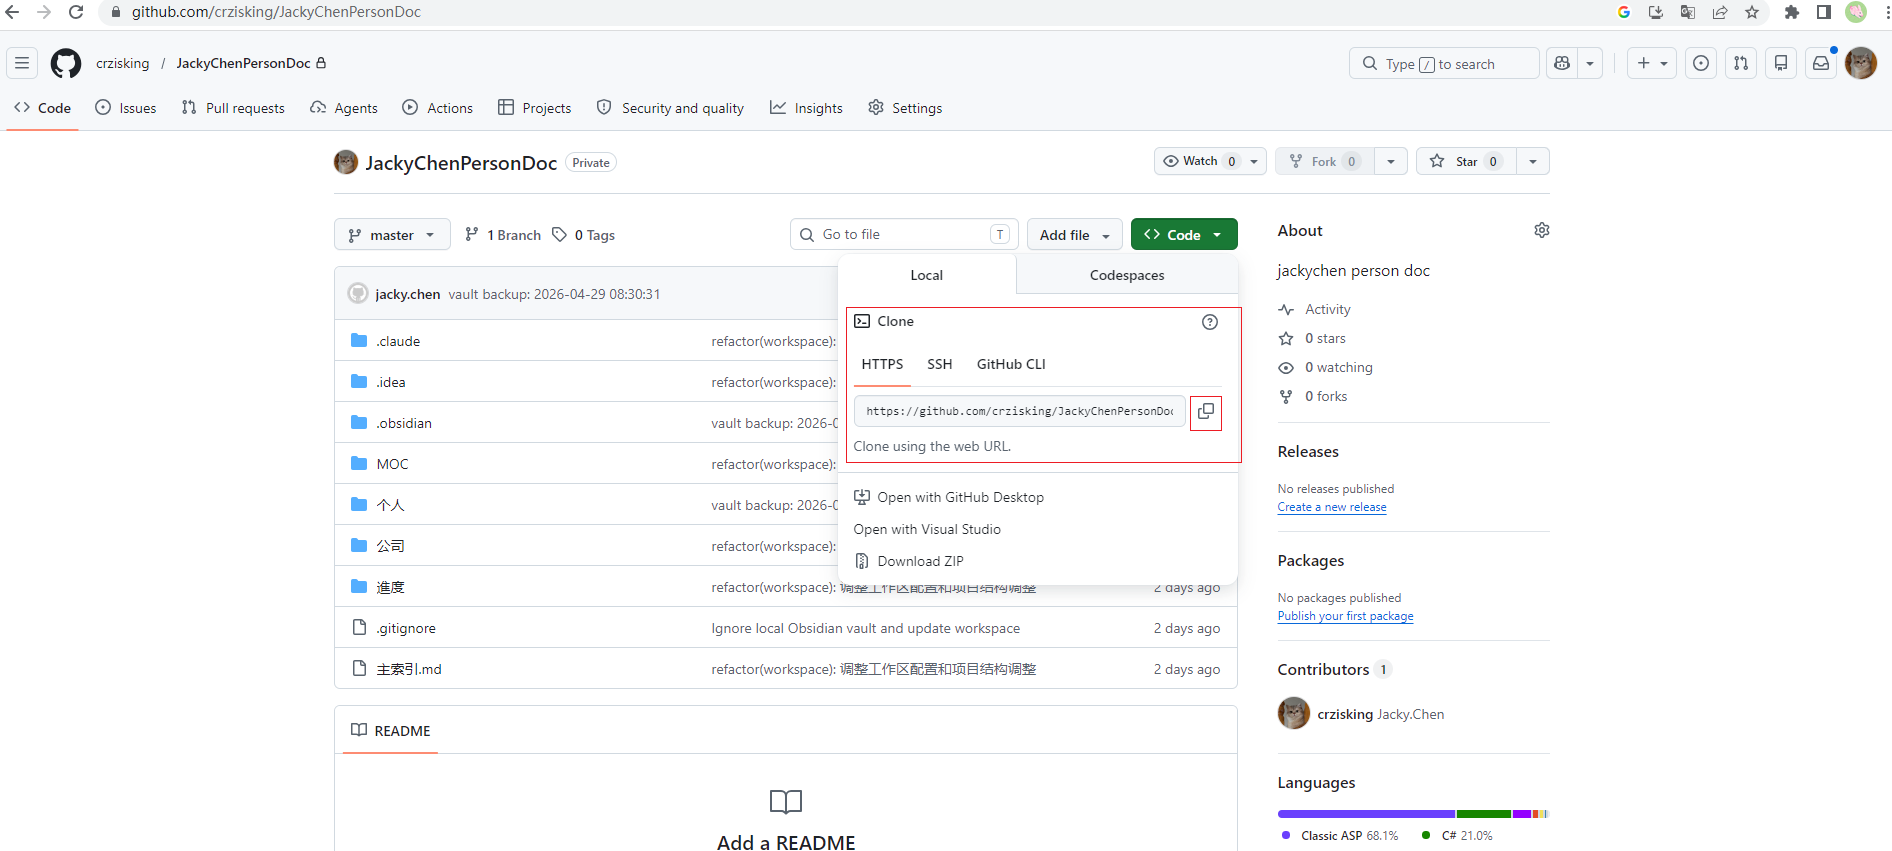
Agent 會自動執行命令並完成。如果是第一次用,它會提示你登入 GitHub(按提示授權即可)。
完成後,你電腦上會出現 Personal-Knowledge-Base 資料夾,這就是你以後寫筆記的地方。
第 4 步:安裝 Obsidian / Install Obsidian
打開 https://obsidian.md ,下載並安裝。
打開 Obsidian,第一次會看到歡迎頁,點 Open folder as vault。
選擇剛剛 Clone 下來的
Personal-Knowledge-Base資料夾。進入後就能直接寫筆記了。
你也可以讓agent軟件直接幫你寫筆記
關鍵點:Obsidian 的 Vault 直接用 GitHub Clone 下來的資料夾,不要另外新建。
Key: Use the cloned folder AS the Obsidian vault. Don't create a separate one.
第 5 步:建立資料夾結構 / Create folder structure
在 Obsidian 左側側邊欄右鍵 → New folder,依次建立:
Personal-Knowledge-Base/
  00-Inbox/        # 臨時收集,想到什麼先丟這裡
  01-Projects/     # 進行中的專案
  02-Areas/        # 長期主題(例如:健康、理財)
  03-Resources/    # 教程、參考資料
  04-Archive/      # 已完成的舊內容
  99-Assets/       # 圖片、附件
第 6 步:用 Agent 同步筆記到 GitHub / Sync via Agent
每次寫完筆記想備份時,打開 Agent,直接告訴它:
幫我把今天的筆記提交並推送到 GitHub,commit 訊息寫「新增讀書筆記」
Agent 會自動執行 git add / git commit / git push 三個動作。完成後刷新 GitHub 倉庫頁面就能看到。
The agent runs git add / git commit / git push automatically. Refresh your GitHub repo page to confirm.
常用指令範例:
幫我把所有改動推送到 GitHub看一下我今天改了哪些筆記把 00-Inbox 裡的草稿整理到 01-Projects(Agent 也能幫你重組筆記)
進階:在 Obsidian 另外安裝 Obsidian Git 插件,可以設定每隔 X 分鐘自動 Push,連 Agent 都不用打開。
Advanced: Install the Obsidian Git plugin to auto-push every X minutes — no agent needed.
第 7 步:日常使用建議 / Daily usage tips
筆記命名:
YYYY-MM-DD 主題,例如2026-04-29 個人知識庫搭建.md首頁:在根目錄建一個
Home.md,放今日筆記、進行中專案、常用連結圖片:直接拖進 Obsidian,會自動存到
99-Assets(需在設定 → Files & Links 中指定)敏感資料(密碼、身份證等):不要寫進這個 Vault,避免推到 GitHub
筆記模板 / Note template
# 標題

## 背景 / Background

## 核心內容 / Main Content

## 結論 / Conclusion

## 後續行動 / Next Actions
方案 B:Dify 知識庫搭建 / Dify Knowledge Base
最終效果:把文件丟進 Dify,AI 就能根據這些文件回答你的問題。
End result: Upload files to Dify, then AI answers questions based on them.
第 1 步:拿到 Dify 賬號 / Get a Dify account
向 IT 部門申請一個 Dify 賬號(公司內部部署)。如果是用官方雲端,到 https://dify.ai 註冊。
Ask IT for a Dify account (internal deployment), or register at https://dify.ai for the cloud version.
第 2 步:登入並進入工作台 / Sign in and enter workspace
登入後會看到工作台主頁,左側選單找到 知識庫 / Knowledge。
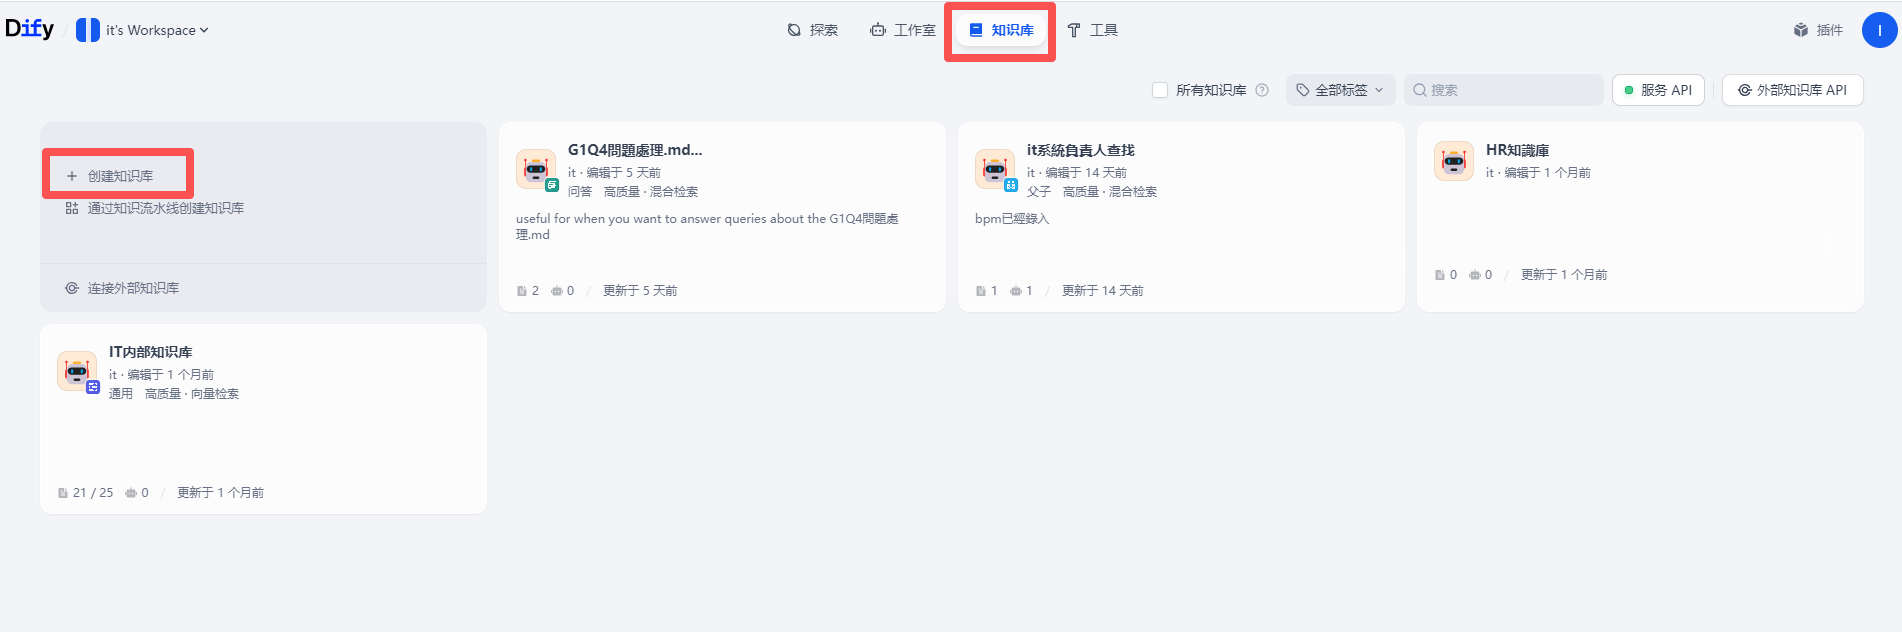
第 3 步:建立知識庫 / Create a knowledge base
點 建立知識庫 / Create Knowledge Base。
選來源:
匯入已有文件(Markdown、PDF、Word、TXT)
同步 Notion(如果你已有 Notion 內容,授權即可)
建立空知識庫(之後再上傳)
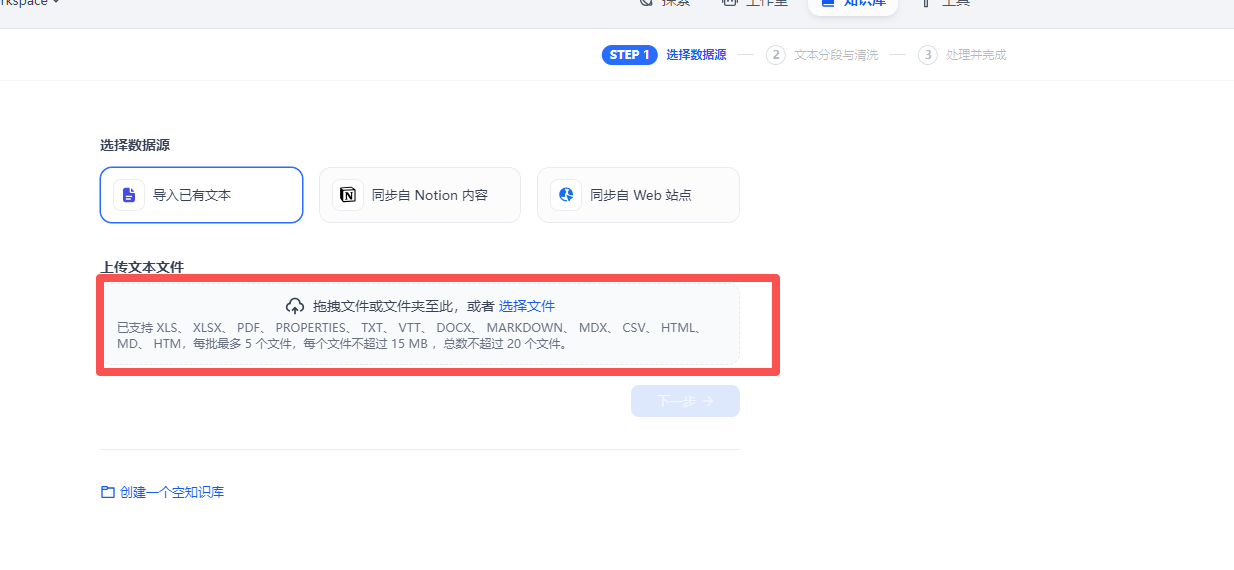
第 4 步:上傳並測試 / Upload and test
第一次只上傳 同一主題 的少量文件(例如只傳「產品手冊」相關),避免資料混亂。
上傳後 Dify 會自動切分(chunking),等待索引完成。
用 5–10 個真實問題測試 AI 回答:
答案準確嗎?
引用的資料對嗎?
有沒有漏答?
測試 OK 後再上傳更多文件。
命名建議 / Naming suggestions
按主題分開建多個知識庫,不要全部塞一個:
個人知識庫-工作個人知識庫-學習個人知識庫-產品資料
上傳原則 / Upload rules
先整理再上傳,不要把雜亂草稿全丟進去
文件標題寫清楚(AI 會用到)
同主題放同一個知識庫
定期刪除過時內容